Xero has introduced a number of great features over the years that make invoicing and customer management simple and automated. Like most good solutions, you first need to invest a little time upfront to set up your system, and then it will do the hard work for you going forward.
1. Xero’s New Invoicing
Xero has two invoicing options available to customers that you can easily switch between. The new invoicing option and the classic invoicing option. There are a number of advantages to the new invoicing, but our favourites are below.
Credit Limits
Using the new invoices, credit limits are shown as you create the new invoice for your client, warning you if they are over their limit and allowing you to take action before you provide more goods and services. Set their credit limit under their customer details to get started.


Delivery Address
When creating a new invoice, your customer details will populate automatically, including their business address and a delivery address if completed under their street address. For more information around setting it up, check out Xero’s article here.
Packing Slips
With the new Xero invoice, you can print out a basic packing slip or create a customised slip to suit your needs. You can print a packing slip from an invoice awaiting payment or a paid invoice (even better!). The packing slip will show contact details, item, description, and quantity. Payment information and financial fields won’t be displayed.

2. Repeating Invoices
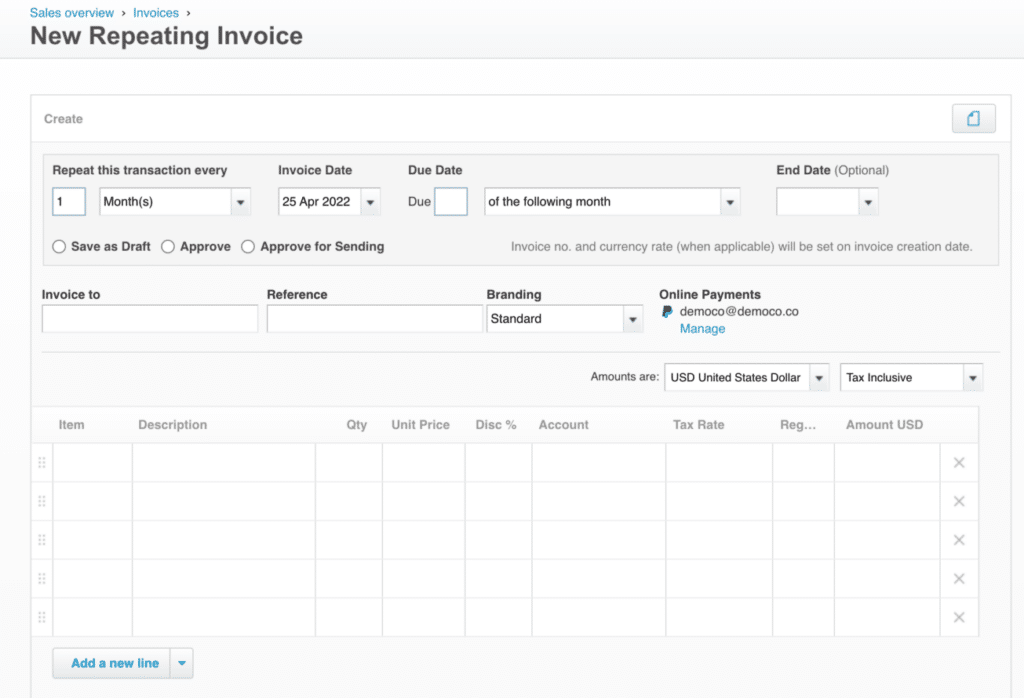
One of our favourite features by far is repeating invoices. If you’re in the services space and bill clients on a retainer basis, this feature is perfect for you. You can schedule them to go out in multiples of weeks or months and set them for draft, awaiting approval or approved. When setting them as approved, you’ll be able to sit back and enjoy automated scheduling of all your invoices. We love to use <placeholders> to include the date range within the description or reference of the field to make it slightly more customised for clients.

For more complex invoicing needs, we’d recommend trying out Ignition for your proposals, which helps automate the admin behind billing clients. If you have contracts or proposals that require client sign-off and repetitive invoices, sign up to Ignition to see how it can help you spend more time doing billable work rather than admin. Click below, fill in the form and one of their team will be in touch with you. It’s an integral part of our tech stack in running our business.
3. Invoice Reminders
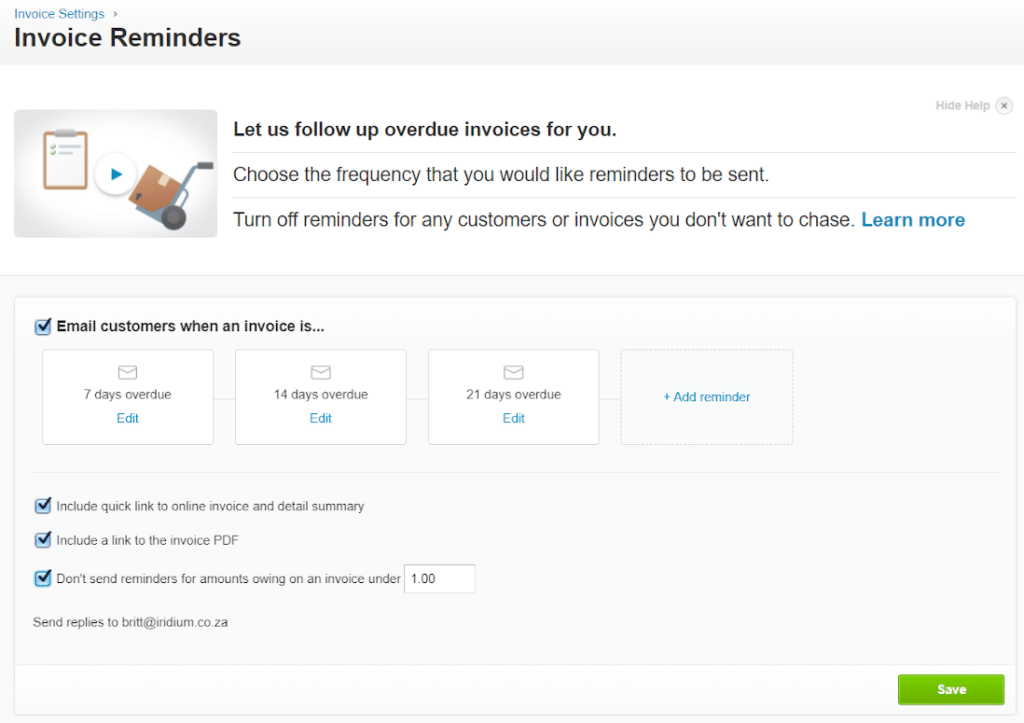
Speaking of taking away repetitive work, you can set up automated payment reminders on overdue invoices and even preemptively send reminders before the invoices are overdue.
All you need to do is, go to Business > Invoice Settings > Invoice Reminders and begin customising when you would like to remind your clients to pay you. The emails sent can be customised to be friendly, to include banking details, or to highlight any terms and conditions you may have for late-payments and change based on the reminder timeframe.

You can also include a minimum amount that is due on an invoice so as not to irritate customers for small rounding amounts like R2. Reminders are set across your organisation and so will go out to all customers per invoice outstanding unless you switch them off at a customer/invoice level individually so be sure to take this into consideration before turning things on. It is also based on your bookkeeping being fully up to date as it assumes any outstanding invoices within Xero are unpaid (not unreconciled!).
4. Pay Now
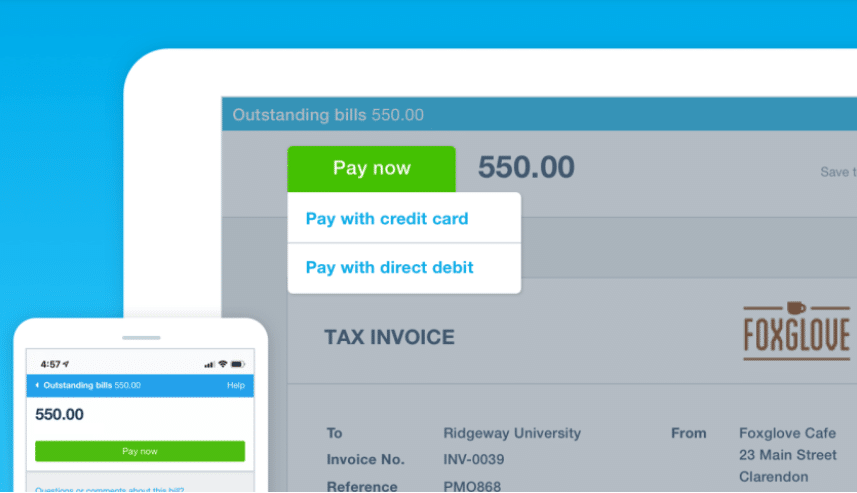
Add Payfast, Paypal, or custom payment methods to your invoices to simplify your customer payments. By adding this feature to your Xero invoices, you will have a Pay Now button on your digital invoices that will automatically redirect clients to a secure payment gateway allowing them to settle your invoice faster.
When you add a payment service to an invoice template, it becomes the default payment service applied to invoices using that template. To do this:
- Click on the organisation name, select Settings, then click Payment services.
- Under Connected payment service, click Manage Themes.
- Under Branding themes, find the invoice template you want then select the payment service provider.
- Click Save.
If you use a payment service that doesn’t integrate with Xero, you will need to get a custom URL from your service provider. The custom URL allows you to apply the payment service to an invoice template so you can accept online payments.

5. Customer Groups
We have found grouping customers under Contacts in Xero to be a great way to visualise your customers. For example, you can group according to team, location, credit days, debtors clerk, or pricing methods (EFT, Debit Order, etc), which will then pull into your reporting. Pulling an Aged Receivables report with these groupings will help improve your receivables process and understand and improve your cash flow.

We hope that these simple tips allow you to improve the way you manage your customers and help you get paid faster. For future tips, follow us on social media and check out our upcoming blogs. If you found this useful and would like to know more about our services, pop us a message below and we’ll be in touch.